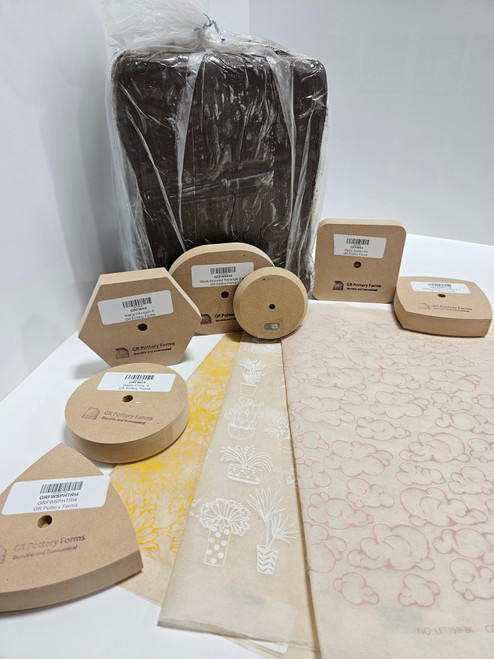
Days are getting shorter, nights are getting longer…Halloween looms closer and around here, we’re ready to bring on the dark! Dark clays, that is! We put together a great project pack for you featuring our DARK clays, some LIGHT underglaze transfers, the new GR Wallie forms and this challenge –
WHAT CAN YOU MAKE WITH YOUR WALLIE?
Obviously, these cool forms can be used to make wall pocket sconces and other slim line objects, trays etc.
Rachel took the tray concept one step further and made a cool divided platter. But when we laid down this challenge to Jeanette, she took it further and made a TEAPOT from the Wallies by joining, cutting apart and re-assembling them.
I loved being challenged to “think outside the box” and it inspired and ignited my creativity. Having a new idea of something you want to create is like being a little kid again! Suddenly the possibilities are endless and everything is exciting!
-Jeanette Oliver
Jeanette started with several iterations of the simple form and then started to revision the parts and pieces of those forms. two whole units joined together to create the body, the feet and spout were formed from pieces of another even the lid and handle were made from cut outs and scraps! Brilliant!
So now it’s YOUR turn to Think outside the box! The Bracker’s Darkness and Light Box Project challenge kit includes 25# of darkclay, your choice of Wallie form and your choice of 3 light-colored underglaze transfers. This box project includes shipping and is priced at under $80!
Basic Wallie use Step by step process:
- First step we recommend is gluing the spacer pin and spacer pull together so that you can easily remove the Wallie from the clay. When gluing, make sure you hold the pieces together for 30 seconds or wait untill the glue dries before using the space puller. The Wallie Space Puller is included in this package deal, if you opt out of purchasing the space puller, please move to the next step.
- Take a slab of clay, rolled out to a recommended 1/4 inch thickness, and place the Wallie Form on top of the slab, then cut the clay slab an inch away from the Wallie Form's edge using a Knife or a kemper needle tool.


- **You can either add transfers on this step or after the form has been made.*** Simply moisten the clay with a sponge (we recommend a mudworks sponge), lay your transfer printed side down and then use the same sponge to moisten and smooth the transfer into the clay, similar to how you would apply a temporary tattoo. Peel off the transfer after it has left the underglaze on the clay, wait aproximately 5-10 minutes until the paper has dried again.

- Next, press the sides of the slab aginst the wall of the form untill it starts to take the shape of the Wallie, we recommend using a stiff rib to keep the walls even and straight. You should to use light to medium pressure until the form takes place.


- Next, cut the clay along the edge of the Form using a Kemper Knife or a tool with a sharp edge that can make a clean cut.


***ALLOW THE SLAB TO DRY TO LEATHER HARD BEFORE PROCEEDING TO REMOVE THE FORM***
- Next, attach the spacerpull to the Wallie form to pull it out if you did not glue it during the first step. Alternatively, you can gently peel the sides of the slab, flip the mold and the form upside-down and let gravity release the mold from the formed slab.
- If you choose to add a transfer at this step, keep in mind the moisture level of your clay as transfers work best on leather hard clay
- Allow the mold to fully dry before firing
- If you chose to create this project using the Bison or Coffee Grind bodies, Bracker's has had the most success firing to cone 5 to avoid bloating in the body during firing


